Project: Marble Maze
Difficulty level: Medium
Description
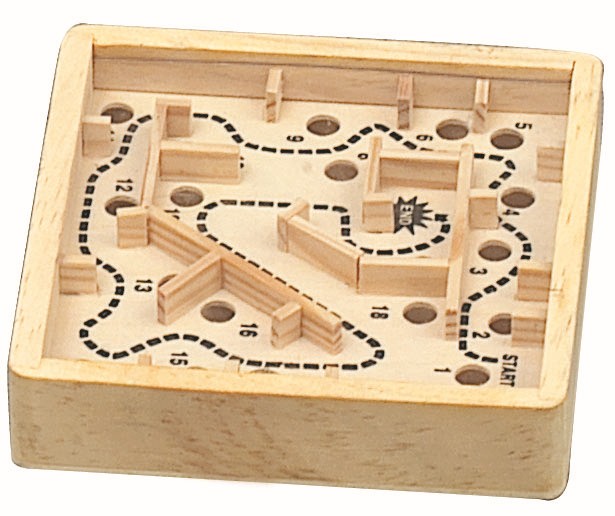
In this project you’ll be creating a digital version of Marble Maze (see the picture if you don’t know what it is). The Sense HAT can tell whether you’re tilting your device, using this feature we can create the game. You’ll also get to design your own maze in this project.
Check out an example solution of the game here:
To control the ball on Trinket, drag the Sense HAT around in the different directions with your mouse.
Project Manual
This project guide will tell you step-by-step the main things you have to do in order to create Marble Maze. For some of the steps, you’ll have to figure out how to proceed yourself, good luck!
Introducing the project
The first thing you should do is open the skeleton code for the project. In programming, skeleton code means code that only has the basic elements of a program. It is up to you to fill in the rest!
You can find the skeleton code on Trinket, here: https://goo.gl/TEVxE8
If you can, you should also create and account and log in to Trinket. This will allow you to save the Trinket projects. Otherwise you have to copy the code on to your computer to save it.
On Trinket, you’ll be able to test your code on a virtual Sense HAT, before you try your code on the real thing.
As you might see, the skeleton code is split up into sections, divided by the headlines. For example:
#### 2. Code section
This guide will go through the various sections (not necessarily in order), and help you write your code. Very important note: You should add the code in the specified section in your skeleton code as you follow this guide.
The next part of this guide will explain the stuff that’s already in the skeleton code when you first open it.
Explanation of the game
The game you’ll be working works very similarly to an actual Marble Maze game. Here’s a screenshot of the game:
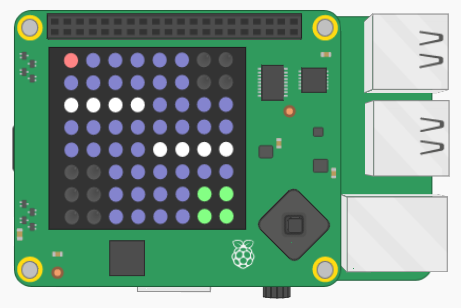
You have a ball (red dot in the picture) that you control move around by tilting the Sense HAT. The ball can collide and be stopped by the walls (white dots in the picture) of the maze. The player loses if the ball goes in the holes (black dots). And the player wins if the ball goes in the goal (green dots).
Explanation of the skeleton code
Before we get on to the coding, it’s worth looking over the skeleton code and make sure you are familiar with it.
The first few lines in the script are:
#### 1.1 Import libraries

import sys
sys.path.insert(1,'/home/pi/Go4Code/g4cSense/skeleton')

from sense_hat import SenseHat
from marble_maze_lib import MarbleMaze
import random
from senselib import *
Without going into detail, these lines are called import statements. They are used to import code from other Python files into your own file. This is useful because you can use other people’s code to simplify your own.
The next part of the code (Sec. 1.2) creates some important Objects (don’t worry if you’re not sure what that means) that we’ll use in the game code.
Sec. 1.3 is where we set up the initial properties of the game is set up. Like the starting position of the ball, the colour of the ball, the colour of the wall, the goal and the holes and so on. You’ll need to edit these values later on in order to customize the game.
Sec. 1.4 is where you’ll create your maze!
Sec. 2 is the part where you’ll get your hands dirty with some real python game programming. If you look at it now, there’s not much there:
#### 2. Main game code

while True:

    #### 2.1 Make the ball move

    #### 2.2 Draw the walls, holes, goals and the ball

    #### 2.3 Update the game

    #### 2.4 Check if the player has won or lost
The most important thing to note about the code is the following:
while True:

    # ... The rest of the code ...
The while part of the code is what we call the main loop. All the code that’s inside the while-clause will be repeated again and again until the game ends. That’s why we call it a loop!
Writing the code
(Sec. 1.3) Set up the game variables
In this section we’ll be defining some variables that we will use in the game. A lot of programming is just about knowing what information to store, and where to store it. For example, some very important information to store is the position of the marble ball on the screen. To set the ball position, you have to edit this line:
game.setBallPosition(0, 0)
Replace the first number with the x-position of the ball, and the second number with the y-position. If you don’t know what that means, the x-position is how many squares the ball is away from the left side of the screen, and the y-position is how many squares the ball is away from the top side of the screen.
The rest of the lines in this section decides the colours of all the things in the game. Currently all the colours are set to black, so you’ll definitely have to change them to something, although you can decide which colours yourself.
Colours in Python are not called “purple”, “yellow” or “brown”. Instead they are given by three numbers. The first number is how red the colour is, the second number is how green it is, and the third how blue it is. The value of the redness/greenness/blueness can be from 0 to 255 (where 255 is the maximum redness/greenness/blueness). For example to set the ball to be purple, we set it to be maximum red and maximum blue, like this:
game.ballColour = [255, 0, 255]
Confusing? Try setting the colours to different things later to get the hang of it.
(Sec. 2.2) Draw the walls, the holes, the goals and the ball
In this section we’ll write code that draws stuff on the Sense HAT.
The first thing we want to do is to draw the floor. You do this using the function:
sense.clear(red, green, blue)
You can replace red, green and blue with any numbers that you like. You should add this code to the start of the section.
The next thing is to add code that will draw the walls, the holes and the goal blocks. There’s already some code that will do this for you, all you need to do is to add the following lines of code to the section:
game.drawWalls()
game.drawHoles()
game.drawGoals()
These functions will draw all the walls, the holes and the goals on the screen.
The final thing is to draw the ball. To do this you use the function:
sense.set_pixel(x, y, red, green, blue)
Where x and y is the position of the ball, and red, green and blue the colour of the ball. You can get the x and y positions of the ball using:
game.getBallX()
game.getBallY()
You’ll have to use these functions within the sense.set_pixel. The colour of the ball is in the game.ballColour variable. For more information about how the function works, you can check the Function Reference document.
After you’ve added all of this, all the stuff should be drawn on the scren if you start it! Because you haven’t yet added anything, it should look similar to this:
![]()
(Sec. 2.1) Make the ball move
In this section, you’ll be making the ball move by tilting the Sense HAT.
Using the game.moveBallHorizontally and game.moveBallVertically functions, we can tell the game how tilted the Sense HAT is, and how fast the ball should move across the screen. For example, to tell the game that HAT is tilted 20 degrees horizontally, and 40 degrees vertically:
game.moveBallHorizontally(20)
game.moveBallVertically(40)
The technical terms for these kinds of “tilts” are yaw, pitch and roll. Look at the image below to get an idea for how they work:
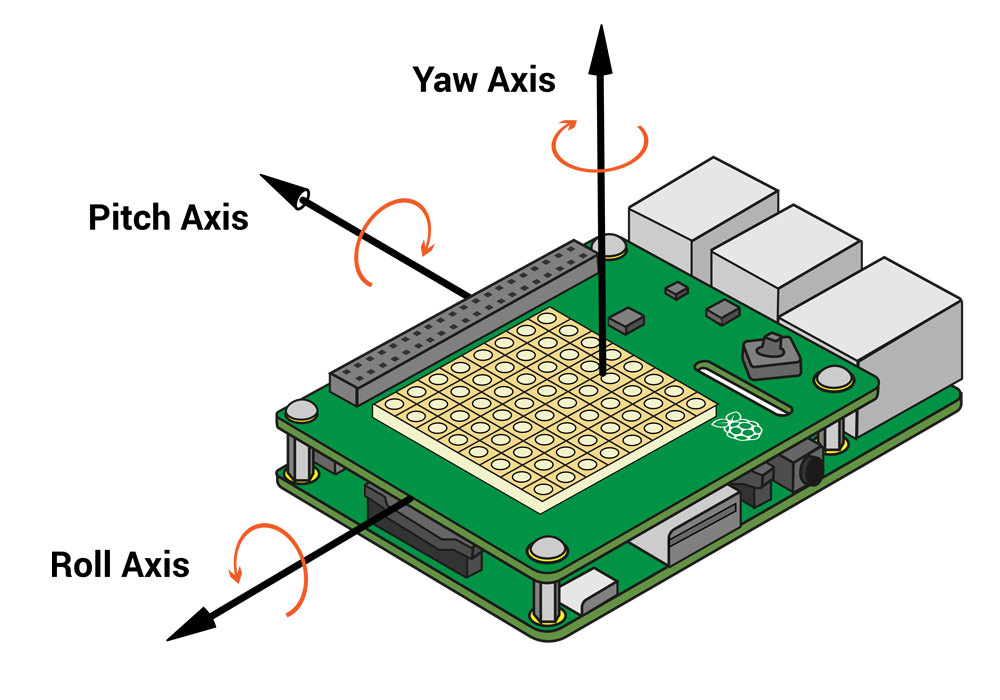
To get how much the Sense HAT is tilted horizontally (“pitch”), use:
sense.get_orientation()["pitch"]
To get how much the Sense HAT is tilted vertically (“roll”), use:
sense.get_orientation()["roll"]
After you’ve written this code correctly, run the game. The ball should move across the screen as you tilt the Sense HAT.
(Sec. 1.4) Create the maze!
This is a fun section! Here, you’ll be creating the maze.
To create a wall pixel:
game.placeWall(x, y)
where x and y should be replaced by numbers. To create a hole pixel:
game.placeHole(x, y)
if the ball falls in the hole, the player will lose. To create a goal pixel:
game.placeGoal(x, y)
At the start, all the pixels are automatically floor pixels, so you don’t need to add them.
After you’ve made the maze, try running the game. All the things you placed should be on the screen!
(Sec. 2.3) Make things happen
This one is simple, just add the following line:
game.update()
This line should make sure that the ball collides properly with the walls.
(Sec. 2.4) Check if the player has won or lost
As we mentioned earlier, you can get the x and y positions of the ball using:
game.getBallX()
game.getBallY()
The following function can be used to check whether there’s a hole at a particular position:
game.isHole(x, y)
The function will return True if there’s a hole at the position (x, y). The following function can be used to check whether there’s a goal at a particular position:
game.isGoal(x, y)
The function will return True if there’s a goal at the position (x, y).
It might seem a bit tricky but using these functions you should be able to check whether a player has lost (if the ball’s position is on a hole) or has won (if the ball’s position is on a goal).
The way to do this is using an if-statement. If you forgot what that was, check the introduction lecture from earlier, or ask a supervisor.
If the player has lost or won, the ball should be placed in the starting position again, so the player can play again.
Finished!
If it’s all done, correctly, the game should now work! Don’t worry if it doesn’t, things often go wrong in programming. Errors in code are usually called bugs. If you have a bug in your code, you’ll have to debug it!
If it works, congratulations! You can either move on to another project or try to come up with new things to add to the current project. Use your creativity! You can discuss any ideas you have with a supervisor.
Author: Lukas Kikuchi
Date: August 09, 2017
Copyright (c) 2017 Go4Code All Rights Reserved.